Author Archives: GCSDev

Delightful Daffodils

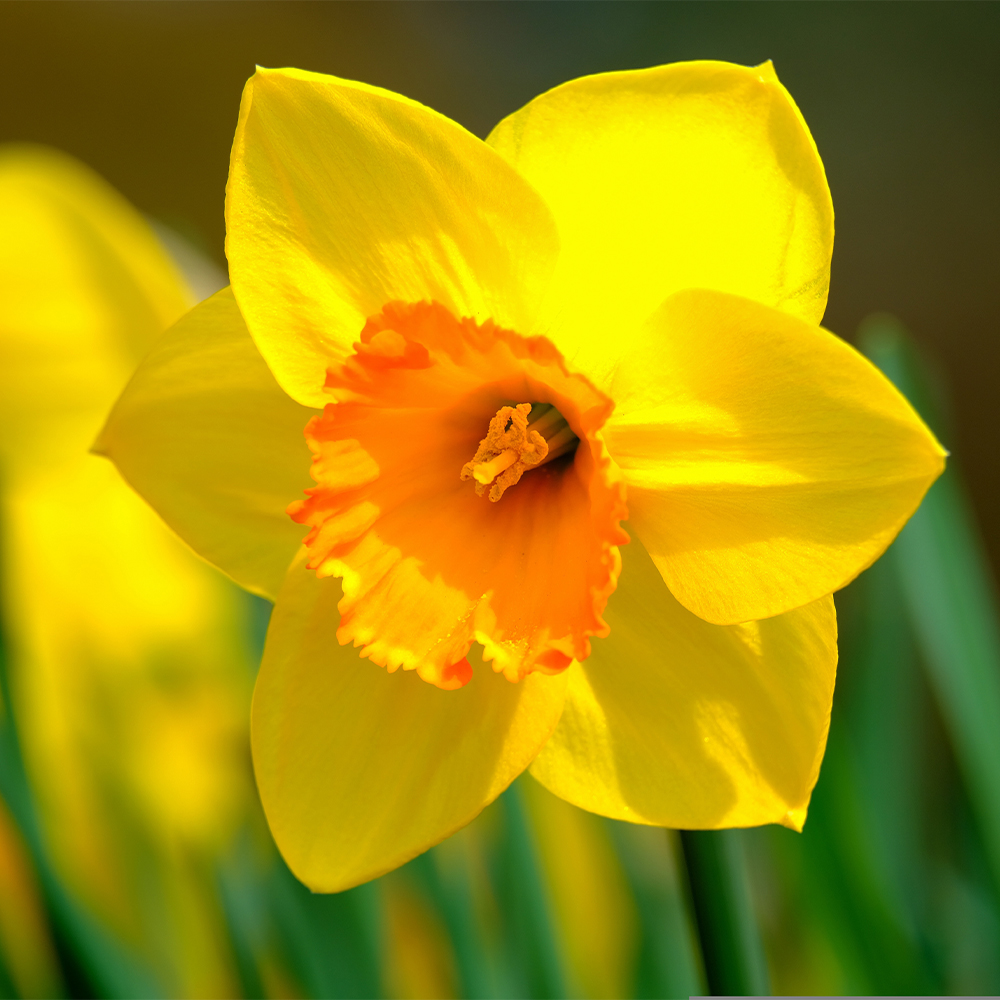
Spring flowering bulbs are a must for every garden. They provide cheerful early-season color at a time when it is most needed, both in the landscape and by our winter weary souls. Daffodils are some of the most delightful Spring flowering bulbs! What makes them so delightful is their ease of care, diversity in their flower color, size, shape and fragrance, resistance to pests and disease, and their carefree ability to increase and return year after year, with little effort.

Daffodil Selection

Did you know that there are over 32,000 registered cultivars of daffodils? This number gives us some indication of the immense diversity of this flowering bulb with some varieties being easier to find than others. As you become more familiar with, and addicted to delightful daffodils, you will never get tired of adding more of these intriguing bulbs to your collection, possibly seeking out a few hard-to-find ones as well.

Note: All daffodils are narcissus, but not all narcissus are daffodils. For the sake of simplicity, we will refer to all narcissus and daffodils mentioned in this article as daffodils. Their care is the same and separating them will only complicate matters.

Daffodils require a cold period to bloom. Most daffodils will flower best in USDA Hardiness Zone 7 and lower. If you live in USDA Hardiness Zone 8 and higher, there are some daffodils that will do well in your area, or you may purchase pre-chilled bulbs. It will help to work with your local garden center to determine which daffodils do best in your particular area.

All daffodils bloom in the Spring. Within the Spring season, some will bloom early, mid-season, and late. Knowing when a particular daffodil flowers, will allow you to plant varieties for a succession of blooms to extend the whole season. As you begin growing daffodils, it may be easiest to choose some of the most popular and easy-to-find varieties

Early-season Bloomers

  • Barrette Browning – white petals with small orange cup, 1 to 2 feet tall, lightly fragrant.
  • Rijnveld – golden yellow, 15 inches tall, delightfully fragrant.
  • Tete a Tete – buttercup yellow, multi-flowering, miniature at 6 to 8 inches tall, fragrant.

Mid-season Bloomers

  • Dutch Master – large, golden-yellow daffodil, 1 to 2 feet tall, lightly fragrant.
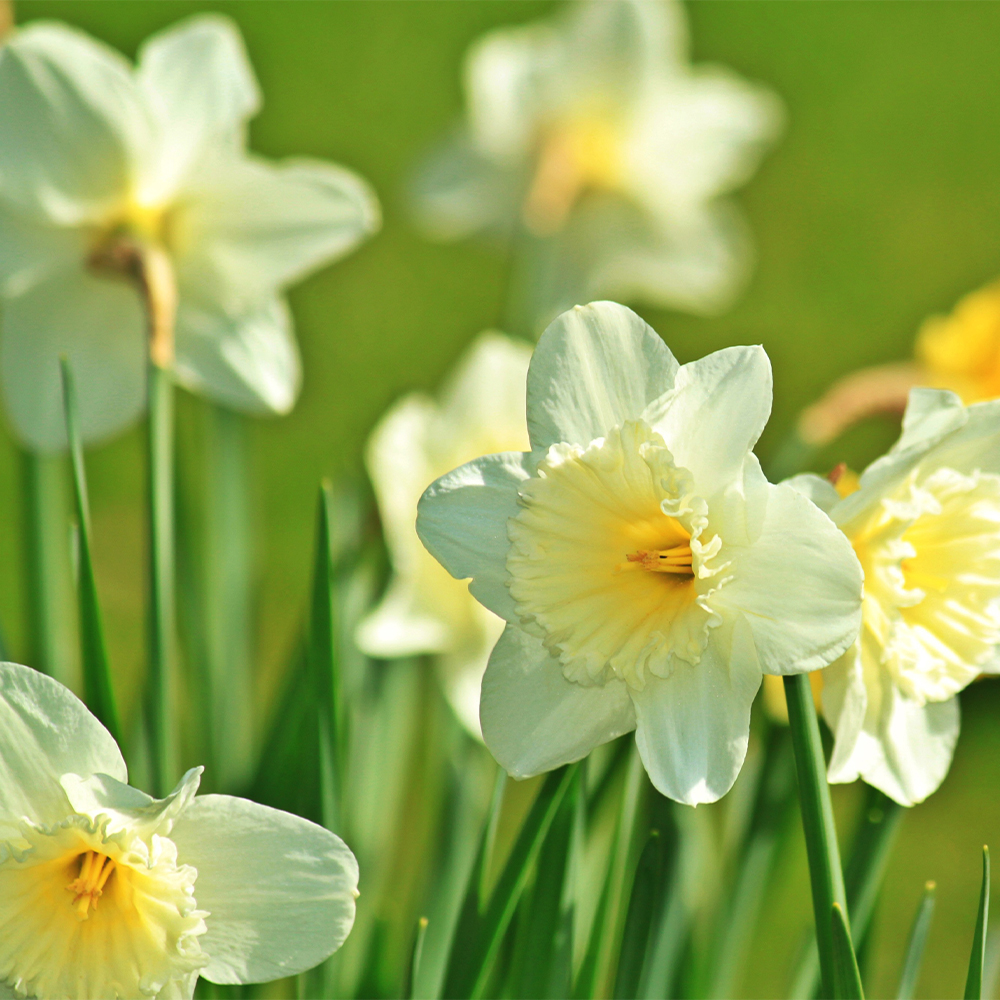
  • Ice Follies – creamy white petals with a pale-yellow cup, 20 inches tall, lightly scented.
  • Pink Charm – ivory petals with a coral-colored cup, 18 inches tall, fragrant.
  • Professor Einstein – snow white petals with a reddish-orange cup, 16 to 18 inches tall, fragrant.

Late-season Bloomers

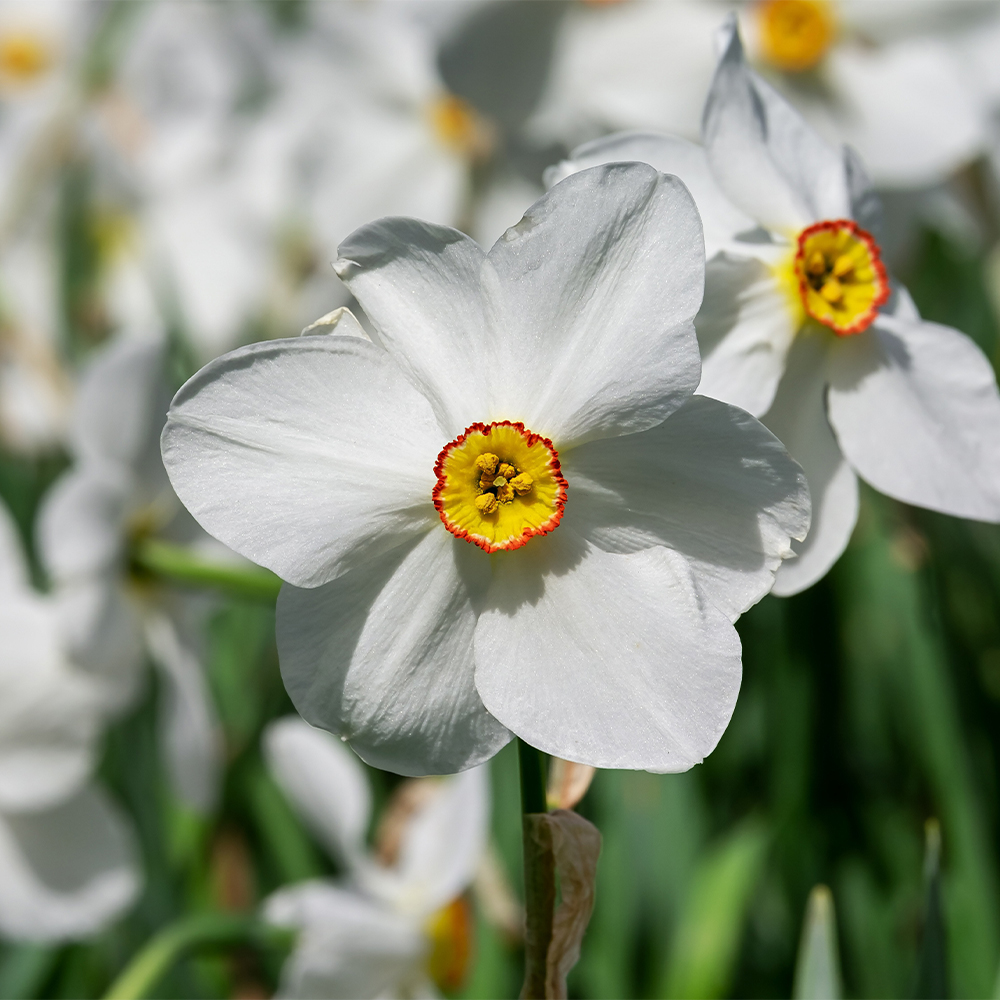
  • Acetaea – pure white petals with a small gold cup rimmed in red, 1 to 1 ½ feet tall, fragrant.
  • Cheerfulness – small flowering, multi-flowering and multi-stemmed, white double flowers with pale yellow flecks, 1 to 2 feet tall, very fragrant.
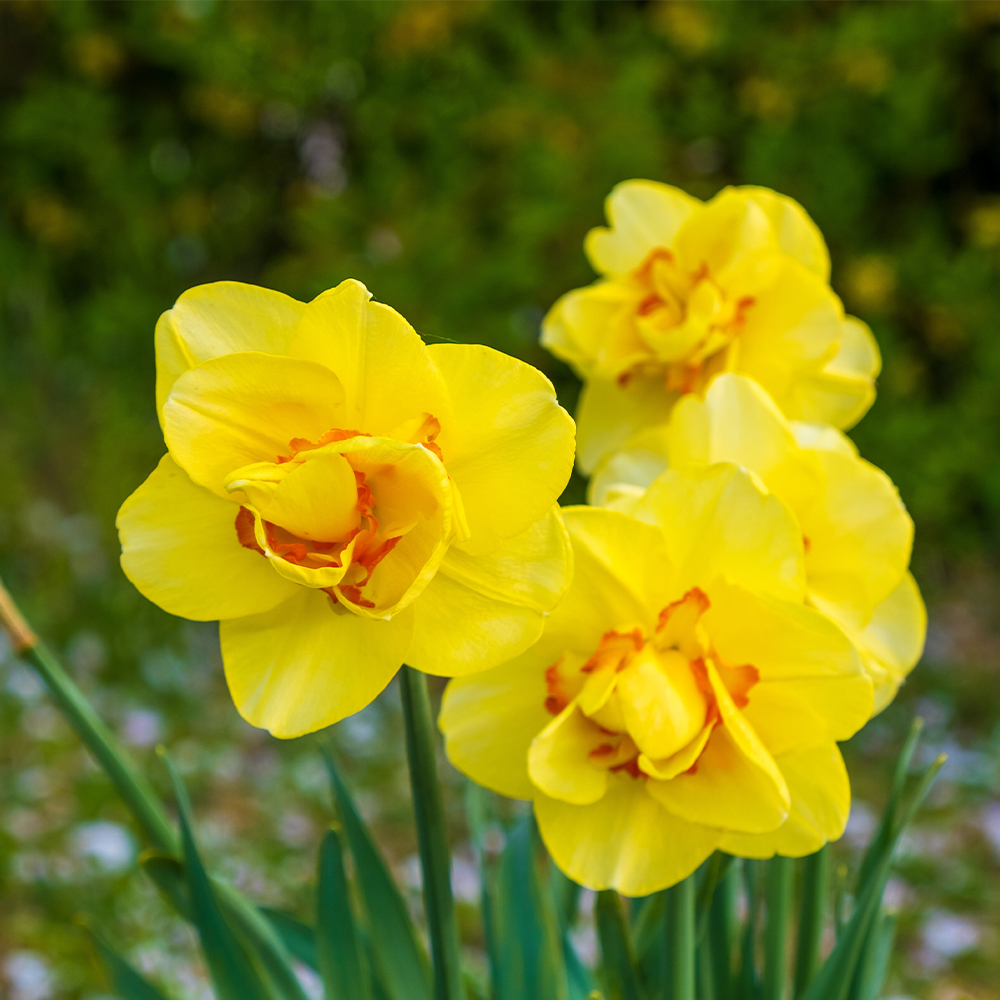
  • Tahiti – large, double flowering daffodil, bright golden-yellow with bright orange ruffled cup, 16 inches tall, fragrant.
  • Thalia – downward facing, pure white flowers with 2 to 3 flowers per stem, 1 foot tall, very fragrant.

Planting Daffodils

Daffodils are purchased and planted in the Fall for Spring blooms and are extremely easy to plant…. easy as dig, drop and done!

  • Plant daffodils in a sunny to part-shady, well-drained site.
  • Daffodils may be planted in single holes, rows, or in groupings.
  • Place daffodil bulbs 6 inches deep, pointy side up.
  • If the native soil is of poor quality or does not drain well, consider amending the soil with a quality compost.
  • Add bone meal to the planting area, to stimulate strong root development, before backfilling the area or holes with soil.
  • No need for deer or rodent protection, these bulbs are pest proof!
  • Water area after planting daffodils and wait for Spring!

With such wide diversity in one group of flowering bulbs, considerable beauty, ample fragrance, significant bloom time, and substantial pest resistance, wouldn’t you agree that daffodils are delightful?
Daffodils

Daffodils

Daffodils

Daffodils

Growing Garlic

Richly flavorful and packed with health benefits, garlic is a great ingredient for all your favorite savory dishes. Growing garlic is very easy and helps you keep a ready supply of this root vegetable (often also referred to as an herb or spice) on hand for quick access and instant flavoring.

Health Benefits of Garlic

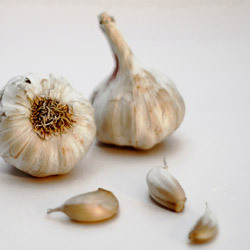
Garlic, which is related to onions, shallots, and leeks, has many documented health benefits, making it a worthwhile addition to your diet. This bulb vegetable is segmented into cloves, and may yield 10-20 cloves per bulb. Just a clove or two added to different dishes can…

  • Boost immune function, minimizing colds and other minor ailments
  • Reduce blood pressure to improve cardiovascular health
  • Lower bad cholesterol levels and the risk of heart attack or stroke
  • Reduce bone loss risk, particularly in older women
  • Lower inflammation to improve arthritis and joint function

The health benefits of garlic are so well known that the plant has featured prominently in the medical treatments of different cultures for centuries, including the ancient Babylonians, Egyptians, Greeks, Romans, and Chinese. Today, many doctors continue to promote garlic as part of a healthy diet.

Tips for Growing Garlic

Fresh garlic has the most health benefits and is the most flavorful. It’s easy to grow garlic either in the garden – it is resistant to both deer and rabbits, making it ideal for borders to protect other produce – or in kitchen pots for easy access for all your cooking. To make the most of growing garlic…

  • Choose organic or locally grown garlic to grow. These cloves won’t have chemical treatments that could inhibit growth, and you will be able to monitor exactly what care your garlic receives.
  • Opt for hardneck garlic in northern climates because it is hardier, whereas softneck garlic can easily be grown in mild climates. If you will grow garlic indoors, either variety is suitable.
  • Choose large, firm cloves without any signs of damage, softening, or bruising for the best growth and largest crop to harvest.
  • Provide a cooling period of 6-8 weeks in the refrigerator for hardneck garlic, which requires a dormant period for optimal sprouting. Softneck garlic does not need as much cooling.
  • Use a pot at least eight inches deep so cloves have plenty of room to develop, and the pot should have abundant drainage holes to prevent root rot.
  • Space cloves at least 3-4 inches apart, or plant just one clove in each pot so the bulbs have adequate room for full development.
  • Use organically rich potting soil, or amend garden soil with compost to nourish young garlic. The soil should be loose and well-draining so garlic bulbs aren’t cramped.
  • Leave the papery skin on cloves for planting, and position cloves pointy-side up, 3 inches down into the soil. Cover the soil with a light layer of mulch or straw for protection.
  • Position garlic where it will receive 6-8 hours of sunlight per day. Indoors, a south- or west-facing window is ideal, or use a supplement grow light to help garlic grow best.
  • Feed garlic carefully, using natural fertilizer, compost, or a high-phosphorus blend specially formulated for larger, healthy bulbs.
  • Water garlic well. The soil should be uniformly moist but not overly soggy, or the bulbs will rot and be unable to flourish.
  • If temperatures drop, protect garlic pots by wrapping them in insulating bubble wrap, carpet, or straw bales. For garden garlic, a layer of mulch will help keep soil temperatures even.

Harvesting Your Garlic

Garlic is slow-growing and will take 7-9 months before fresh bulbs can be harvested. When approximately 50-70 percent of the green tops of garlic plants begin to turn yellow or brown, the bulb is mature and ready to harvest. Use a hand rank or garden fork to carefully loosen soil around the garlic, gently lifting the bulb. Avoid bruising, scratching, or breaking the bulb, which would cause it to rot.

Gently wipe off excess dirt from the bulb, but leave the paper covering intact. Trim off the roots and stalks, and place the fresh bulbs loosely in paper bags in a cool, dry spot for 1-2 weeks. Air circulation should be good to cure the bulbs evenly, and garlic should be stored in a cool, dry place until it is ready to use, or until the best resulting cloves have been dormant long enough to plant and start the cycle over again for even more fresh garlic to enjoy.

Fall Chrysanthemums

No flower is more iconic of autumn than the chrysanthemum, and these beautiful mounding perennials are ideal for fall flowerbeds, pots, window boxes, borders, and many other uses. How will you get creative with chrysanthemums this fall?

Why We Love Chrysanthemums

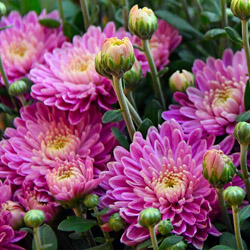
Just when many other flowers are fading at the end of summer, chrysanthemums, or mums, are coming into their glory with a range of stunning autumn colors. Depending on the cultivar, these plants sport yellow, white, red, orange, bronze, pink, peach, wine, purple, and bicolored blooms. The flowers range from small, button-like blossoms to larger blooms reminiscent of daisies. Mum blooms are long-lasting when cut and they’re just as lovely in floral arrangements and bouquets as they are planted in containers, flowerbeds, and the landscape. This makes mums extremely useful for all manner of autumn décor.

Chrysanthemums are native to east Asia and northern Europe and were first domestically cultivated in China nearly 600 years ago. Today, there are more than 20,000 chrysanthemum cultivars worldwide. They are deer- and rabbit-resistant, making them a hardy option for landscaping beds, and with a bit of thoughtful care, these tender perennials can be a wonderful addition to any flower garden or fall containers.

Caring for Chrysanthemums

The hardiness of chrysanthemums depends on the cultivar as well as the local climate and even the microclimate in your landscape. These flowers prefer well-drained, rich soil with a neutral pH, so it is best to use a good quality potting soil in containers. When planting chrysanthemums in the garden or landscape, mixing compost or peat moss in the planting hole will help increase drainage and nourish the soil to promote the best blooms. A good rule of thumb is that if soil is good for vegetables, it will also be good for mums – making them a wonderful choice to refresh a garden after the summer harvest has finished.

Chrysanthemums grow best in full sun requiring a minimum of six hours per day. If mums are planted in containers, consider using a mobile plant cart or a stand with casters so  that the pots may be moved to brighter areas, if needed, as the season progresses.

Chrysanthemums prefer evenly moist, but not soggy, soil. Because of their thick, mounding habit, it is best to water mums from below suing a soaker hose or irrigation drip system in garden beds. In pots, mums should again be watered from below the plant but above the soil line. A watering wand will make this job direct and easy. Be sure to drain excess water from saucers after watering so the roots do not remain continually wet.

Fertilizing chrysanthemums every month through the spring and early summer, with a balanced fertilizer, will help them grow and bloom well, but if mums are planted in the Fall, they should not need extra feeding as long as they were planted in rich, nutritious soil. Deadheading spent blooms by pinching them back can encourage more flowering and help mums maintain their compact, mounding habit.

Decorating with Fall Mums

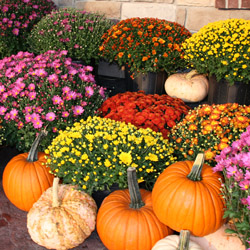
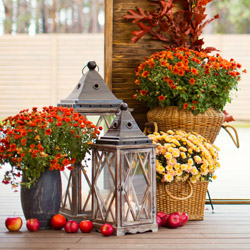
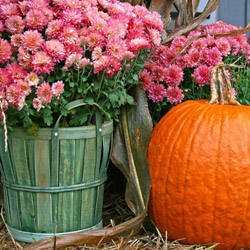
Chrysanthemums are a beautiful choice not only in the garden, but are equally lovely in welcoming porch pots, deck or patio containers, or even small indoor pots and arrangements. Add an extra touch of fall with rustic containers, such as wine barrels, baskets, or terra cotta pots, or glam up your mums in hammered copper or bronze pots that will accentuate their color. A burlap ribbon or bow can be a charming accent, and you can give more seasonal flair to mum arrangements or flowerbeds by adding pumpkins and gourds as fun decorations. Indoors, use small pails or pots for petit mum arrangements, or add them to larger arrangements with grain sprigs, dried pods, colorful leaves, or twists of grapevine for additional texture.

Fall chrysanthemums can be a pleasant burst of autumn color, whether they are part of the landscape or are used in containers, pots, or arrangements and we carry a wide selection to make your fall home suit the season!

Creating a Low-Maintenance Landscape

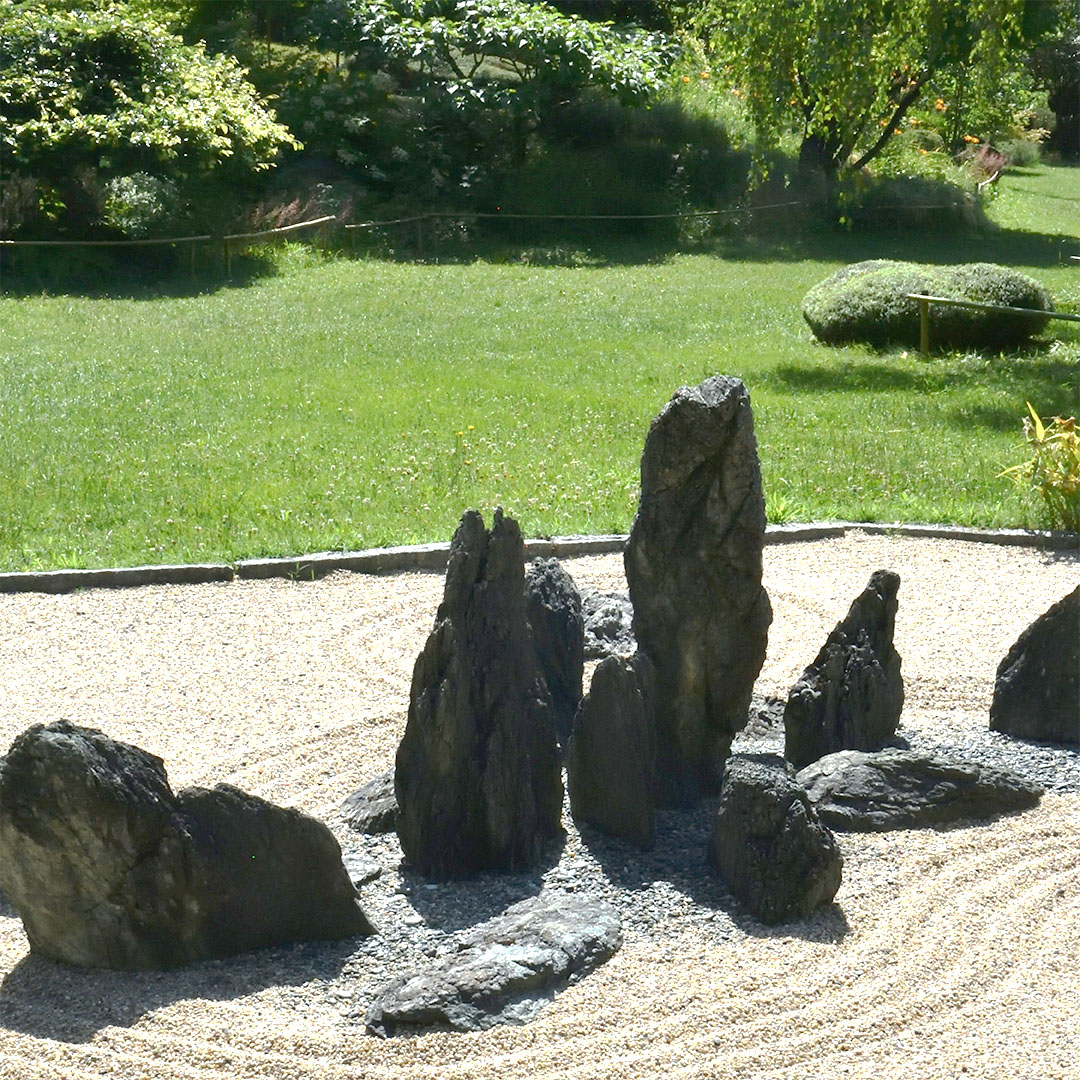
Looking for a landscape design that delivers curb appeal without demanding your weekends? It might be time to discover the benefits of decorative stone! Stone, rock, and gravel offer practical, polished solutions that minimize upkeep, maximize style, and provide significant long-term savings. If you’re eager to take yard maintenance off your to-do list without sacrificing an attractive outdoor space, you’re in the right place! Prospector’s Nursery is here to guide you through everything you need to know about creating a stunning, low-maintenance landscape with rock.

Why Choose Rock?

Decorative rock landscapes go far beyond simple aesthetics. When you invest in a rock-based design, you’re choosing function, longevity, and a welcome break from repetitive yard work. Here are some core reasons why more property owners are switching to rock:

Long-Lasting Impact

Unlike wood mulch, which decomposes and demands frequent replenishing, decorative stone persists for five years, a decade, or even longer. Rock holds its color, resists breakdown, and keeps your yard looking consistent year after year. This translates into more time and money saved on outdoor upkeep.

Excellent Weed Suppression

When properly installed over quality landscape fabric, decorative rock forms a powerful physical barrier that blocks most weeds from emerging. This simple step reduces your need for herbicides and slashes your time spent on hands-and-knees weeding.

Minimal Watering

While organic mulch can help retain moisture, it often requires maintenance and doesn’t reduce the need for watering as much as you might think. Rock needs no watering at all. When paired with drought-tolerant plants, such as succulents, or xeriscaping, a rock landscape becomes a water-efficient solution offering both immediate and long-term environmental benefits.

No Decomposition or Pest Risk

Mulch is organic, which means it breaks down over time and can invite termites, ants, and pests. Rock, on the other hand, never decomposes, attracts fewer pests, and stays put even during heavy storms or wind. This results in a cleaner, more predictable landscape.

Fire Resistant & Durable

Decorative stone adds a layer of fire resistance to your property, which is especially critical in wildfire-prone regions. Rocks don’t burn, and they serve as a natural buffer near outbuildings, fences, or homes.

Where to Use Rock?

At Prospector’s Nursery, we often hear customers ask, “Where exactly should I use decorative rock?” The answer is almost anywhere! Rock is one of the most versatile materials in landscaping, offering beauty and durability in every corner of your outdoor space.

Long-Term Garden Beds

Start by replacing mulch in your permanent garden beds. Decorative stone stays in place longer, resists fading, and won’t break down like wood chips, making it a significant upgrade around shrubs, trees, and perennials.

Patios, Paths, & Seating Areas

Rock is also ideal around patios, along walkways, and under outdoor seating or play areas where grass struggles to grow. It provides a smart, low-maintenance solution that maintains high curb appeal. It also performs beautifully in high-traffic zones, such as front entrances, signage beds, or along driveways, especially where you want a tidy, professional look without constant upkeep.

Types of Landscape Rock

With such variety in shape, color, and texture, landscape rock is more than just functional—it’s a stunning design element. Some popular options include:

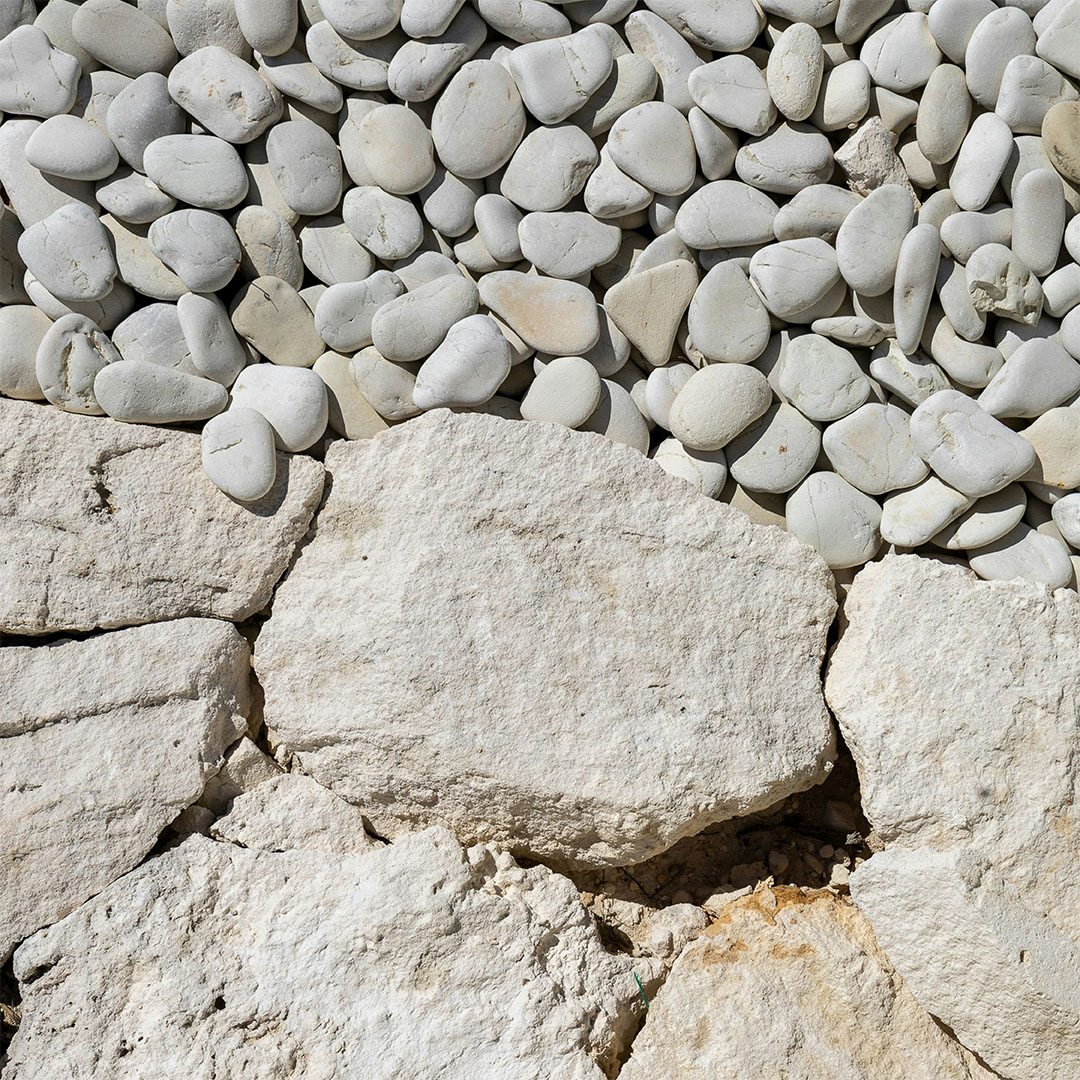
  • River Rock: Smooth, rounded stones available in multiple colors and sizes. Perfect for naturalistic designs, dry creek beds, and defining garden borders.
  • Crushed Limestone: Clean and tightly compacting, making it ideal for driveways, walkways, and fire pit zones.
  • Pea Gravel: Small pebbles that provide comfort underfoot. Excellent for patios, playgrounds, or paths.
  • Slate Chips: Angular and modern, often used for high-contrast, contemporary beds and commercial plantings.
  • Decomposed Granite: A firm, drainage-friendly surface that packs tightly for paths, patios, or even outdoor seating areas.
  • Lava Rock: Lightweight, porous, and bold in color. Offers excellent drainage and a distinctive aesthetic for specific applications.

Selecting the right rock can enhance both function and visual appeal, so consider the colors and textures that harmonize with your home’s exterior or business brand.

Maintenance Tips

A landscape built with stone offers impressive reductions in maintenance, but a little effort goes a long way toward keeping it pristine. Consider these proven tips:

  • Install High Quality Landscape Fabric: Always start with a professional-grade fabric beneath the stone. This keeps weeds at bay, allows rainwater through, and prevents rocks from mixing with the soil below.
  • Refresh the Surface Layer Occasionally: Over time, tracks and settling may cause heavily trafficked areas to thin out. Adding a fresh top layer every few years will restore uniformity and color vibrancy.
  • Use Proper Edging for Containment: Edge beds with steel, concrete, or stone borders to prevent rock migration into lawns or other planting areas.
  • Keep Debris Under Control: Use a blower or light rake to clear leaves and organic matter in fall and spring.
  • Apply Pre-Emergent Herbicide: For added security against weeds, treat beds with pre-emergent product once or twice a year, or as needed.
  • Rinse Rocks: If dust or mud builds up, rinse with a garden hose or use a pressure washer on the lowest setting to restore their natural look as needed.

How to Select the Right Materials

How does decorative stone compare with organic mulch or a turf-heavy yard? Here’s a breakdown:

Material Maintenance Level Best Applications Longevity
Rock Very Low Permanent Beds 5 – 10+ years
Mulch Moderate Flower Beds
Annual Gardens
1 – 2 years
Turf High Play Areas
Lawns
Dog Runs
Ongoing

If your goals include lasting impact, hassle-free ownership, or improved property value, rock is typically the standout choice.

Stunning Results with Minimal Effort

A well-designed rock landscape offers lasting beauty with minimal work. The right mix of stones can add dynamic texture, highlight architectural features, and give your property a cohesive, professional appearance. By making smart choices up front, you can achieve eye-catching curb appeal and enjoy true low-maintenance living for years to come.

Prospector’s Nursery provides an extensive range of landscape stone, from classic river rock to dramatic granite chips. Our staff is ready to help you calculate quantities, select complementary rock types, and even assist you with installation. Whether you’re revamping a single bed or tackling a multi-acre project, we’re here to help every step of the way.

Bringing Butterflies to the Backyard

In spring, female butterflies will be mostly concerned with finding their species’ specific host plants on which to lay fertilized eggs. Instinctively, they know they must find plants to ensure that their caterpillars will have appropriate food for survival after hatching. Both male and female butterflies will be looking for flowers with nectar for their own survival. And, they will be searching for shelter from rainy or windy weather, a sunny place for basking, and a source of water. Because many natural butterfly habitats in North America are disappearing at an alarming rate, it is becoming increasingly difficult for butterflies to find these necessities of life.

Starting a butterfly garden can be simple and rewarding if you follow these pointers. The most important thing you can do as a gardener is to plant both nectar and host plants in your garden. Providing host plants for caterpillars to feed on, will allow you to watch the metamorphosis from caterpillar to chrysalis to butterfly. So, do not discourage caterpillars. They may make your garden plants look bad but it’s usually only temporary. Most important – do not use pesticides! You may be killing off the very insects you made the garden for. And, you don’t have to have a large area to get a response. Just a few select plants will spur some action. Choose the sunniest spot possible for your butterfly garden. It could be any size or shape; even a short border will work. A combination of woody shrubs, perennials and annual flowers works best, but using just a couple of plants can still yield results. Planting a section of wildflowers is an easy way to cover a problem area and lure some butterflies to your yard. If you don’t have the room for a garden, fuchsia, petunia or impatiens hanging baskets will attract butterflies as well as hummingbirds.

The following is a list of plants that attract butterflies:

Woody shrubs:

  • Glossy Abelia
  • Butterfly Bush
  • Japanese Privet
  • Honeysuckle
  • Weigela
  • Spiraea
  • Lilac
  • Deutzia
  • Trumpet vine

Perennials:

  • Achillea (Yarrow)
  • Butterfly Weed
  • Aster
  • Shasta Daisy
  • Cosmos
  • Carnation
  • Coneflower
  • Joe-Pye weed
  • Sunflower

Annuals and Tender

Perennials:

  • Heliotrope
  • Lantana
  • Rosemary
  • Marigolds
  • Petunias
  • Geraniums
  • Snapdragons
  • Portulaca
  • Zinnias
  • Allysum
  • Fucshia
  • Vinca
  • Balsam
  • Dahlia
  • Impatiens
  • Salvia
  • Verbena
backyard-butterfly-1

backyard-butterfly-2

backyard-butterfly-3

What to Do During a Drought

Dire warnings about drought conditions can worry even experienced gardeners, but there are easy ways to save water and save your trees, flowers, vegetable patches, herb gardens and decorative landscaping at the same time.

  • Spray Trees & Shrubs With an Anti-Transpirant
    If pruning, only remove dead material from trees and shrubs, anything more will encourage new growth. This takes energy that a drought-stressed plant cannot afford. Instead, spray leaves with an anti-transpirant or anti-dessicant to help leaves retain what moisture they have.
  • Water Early
    Morning temperatures are cooler and the sun is not as intense as later in the day so there is less moisture loss due to evaporation. Also, water sitting on foliage will have a chance to dry during the day minimizing the chance of fungal infection, especially during humid weather.
  • Water Slowly & Deeply
    Watering slowly will allow the moisture to penetrate more deeply into the root zone rather than running off the soil surface. Create depressions or water traps around larger plants to hold the water where you want it until it can saturate the soil. Remember to water trees at the drip line, not at the trunk base, as this is where the roots are most active. Drip irrigation bags are excellent for watering newly planted trees.
  • Thoughtfully Add to Landscaping
    If you are adding to your landscaping during a drought, choose water-wise, drought-resistant plants or consider xeriscaping techniques that minimize water use. Native plants, succulents and cacti are all great choices and require minimal water. In very severe drought conditions, it may be best to not replace plants, at least until watering conditions improve.
  • Water the Soil, Not the Leaves
    Plants take up water through their roots. Water landing on the foliage will be lost due to evaporation. The more water you direct to the soil, the less you will waste – drip systems and soaker hoses are ideal options. The key is infrequent but heavy watering rather than lighter, more frequent watering. This encourages deep root growth, which increases drought tolerance.
  • Conserve Precious Water
    Place a rain barrel under downspouts to collect rainwater. Wash the car on the lawn rather than on the driveway. Reuse “gray water” such as bathtub or dishwater and rinse cycle water from your laundry to water your garden. Collect the drip water from an air conditioner (may produce up to 5 gallons in 24 hours) for watering. Replace leaky hoses and sprinklers and use washers to correct leaks at fittings. Shorten showers, turn off the faucet when brushing your teeth and take other steps in the home to reduce water use so more is available for landscaping needs.

No matter how severe a drought or how low water supplies may be, there are ways you can deal with it and still keep your landscaping well cared for.

Drought_5Drought_1

Dealing With Drought

Because plants require moisture to grow and thrive, your garden will probably suffer during periods of low rainfall and intense heat. Insufficient soil moisture will result in smaller flowers and fruit, stunted plant growth, decreased root development and increased plant disease and insect damage. Fortunately, there are many things that you can do to minimize the impact of drought on your garden.

Save Your Soil

Soil is like a sponge that holds and releases all the ingredients that your plants need to survive. Soils that drains quickly, such as sandy or rocky soil, will speed up and increase the effects of drought as water flows away from plant roots. The best way to correct this problem is to amend your soil with organic matter. Amending your soil adds to its moisture retaining ability, adds nutrients essential for plant health and increases soil aeration for ease of root growth. Good choices include:

  • compost
  • composted manure
  • composted or shredded leaf litter
  • mushroom soil
  • dried grass clippings
  • earthworm castings

First, amend soil immediately around plants, in landscaping beds and in the garden, but aim to amend all your soil and lawn eventually to improve its condition and drought-resistance.

Choose Drought-Tolerant Plants

Drought-tolerant plants are adapted to grow well in regions of low rainfall. These plants require minimal water to survive. When planting, try to group plants with the same water requirements together in an area best suited to their tolerance. Plants best adapted to dry conditions include:

  • locally native plants
  • plants with deep taproots
  • plants covered with hair
  • tiny leaved plants
  • succulents and cacti

Swapping out just a few water-hogging plants for more drought-tolerant options in your landscape can have a remarkable impact on saving water and still having a lush garden.

Use Drought-Friendly Watering Techniques

During a drought, you will need to water your garden, flowerbeds and lawn more thoughtfully to keep them well-watered but without waste or excess evaporation. The best way to water a garden is by drip irrigation or a soaker hose. Soaker hoses allow deep watering without runoff. Moisture goes directly into the soil where every precious drop can be absorbed by plant roots. With conventional overhead watering methods, about 35 percent of the water used is wasted due to evaporation. Time saving tip: Install a timing device with a moisture sensor to automatically turn your irrigation system on and off as required relative to any rainfall.

Sprinklers should be used primarily for lawns. Newly seeded or sodded areas must be watered daily during the summer months until established, then frequently through the first growing season. Rain gauges are good for checking the amount of rainfall or for sprinkler placement. Lawn Tip: Do not cut lawns shorter than 3” in the summer. This will shade the soil surface to allow the soil to remain cooler. Also, use a mulching mower to return moist clippings to the soil.

Containers and hanging baskets should be checked for watering every day. Watering wands are used for watering containers and hanging baskets, as they give a gentle spray without splashing the soil. Container Tip: When planting your pots and hanging baskets, incorporate moisture retaining polymers into the soil. When the soil starts to dry it will pull from this reserve.

Make Use of Mulch

After watering, you will want to conserve as much soil moisture as possible. Place at least 2-4 inches of mulch on the soil surface in the planting bed. Mulches help prevent soil moisture evaporation and reduce surface runoff, as well as minimizing weeds that would compete for any available moisture. Ideal mulches include:

  • wood chips
  • shredded bark
  • pine needles
  • grass clippings
  • decorative rocks
  • synthetic mulches

With some thoughtfulness about your plants’ watering needs and how to meet those needs, it’s easy to deal with drought conditions without sacrificing your plants.

Drought_4Drought_2

Drought_3

Long-Blooming Perennials for Summer

By choosing long-blooming perennial plants, you can capitalize on the best of both worlds – plants that come back from growing season to growing season, and those that bloom for an extended length of time. This also means you’ll have more time to appreciate the gardens you create!

Here is just a sampling of long-blooming perennial plants perfect for the sunny summer garden:

  • Achillea (Yarrow) is a very drought and heat resistant plant once established. The flower heads are long-lasting and many colors are available including yellow, gold, pink and pastels in apricot, lilac, salmon, cream and white. Plants grow from 8-36″ tall, depending on variety. The flat-topped flower heads grow up to several inches across, and make excellent cut and dried flowers. The fern-like, gray to gray-green foliage is somewhat aromatic and attractive even when the plant is not in bloom.
  • Coreopsis (Tickseed) is one of the easiest and most rewarding garden flowers. The thread leaf varieties are usually the longest blooming, typically from June through fall. The pale yellow, bright yellow or rosy-pink daisy flowers smother the slender stems and thread-like leaves. Plant height, from 15-24″, is variety dependent. A mid-summer shearing of the seed heads will keep these plants blooming for many more weeks.
  • Echinacea purpurea (Purple Coneflower) is a sturdy, bold-textured favorite with dark foliage that grows to 2-3′ tall and wide. The flowers are large, daisy-like with unique standings of dark-rose purple and lighter in color. Birds and butterflies also love these flowers, adding even more beauty to your garden with their visits.
  • Rudbeckia (Black-Eyed Susan) is an old-fashioned garden favorite. It is hardy, reliable, insect and disease-free and an exceptionally long-blooming plant – typically from July through fall. This medium-green, bold-foliaged plant grows to about 3′ tall and bears golden yellow, daisy-like flowers with dark brown centers. Both Echinacea and Rudbeckia flowers make excellent cut flowers and a wonderful place for butterflies to sit and eat.
  • Gallardia (Blanket Flower) is an American native plant which thrives in the hot sun and has beautiful yellow-orange flowers, marked with red. Height varies according to variety. Some favorites include “Baby Cole” which is a dwarf only 8″ high, “Goblin,” a 12-15” grower, and “Burgundy,” which reaches 18-24” and whose flowers are a gorgeous shade of burgundy red.
  • Ceratostigma plumbaginoides (Plumbago) features intense blue flowers from mid-summer to September. Plumbago spreads quickly to form a neat groundcover and as an added bonus, leaves turn a brilliant red in the fall before dropping. This excellent perennial grows well in light shade also.
  • Veronica (Speedwell) has neat, attractive foliage and abundant flowers in densely packed spikes. Look for the cultivars ‘Goodness Grows’ and taller ‘Sunny Border Blue’ for a beautiful addition of blue to your summer garden, and pair it with red or white favorites for a patriotic theme.

Remember, this is just a brief glimpse of the long-blooming perennials available to choose from. Stop by to see our wide selection of perennials so we can help you determine which plants are best suited to your garden.

Long_3Long_4

Long_5

Long_1

Long_2

Choosing Evening Plants for Fragrance, Color and More

Plants don’t have to be hidden away at night, and there are many different plants that can be dramatic in the evening or well after dark. While the most obvious way to enhance the darkness is to use flowers that are light or white in color, you can also add plants with fragrant flowers or foliage. And, typically, evening bloomers often have a strong fragrance to attract night flying moth pollinators. Popular plants that thrive in evening gardens include…

Annuals and Tropicals

  • Allysum (Lobularia maritime): This fragrant, sweet-smelling annual grows easily to form a mat of small, white, light pink or purple flowers and grows 2-6″. Plant or sow seeds in full sun.
  • Heliotrope (Heliotropium arborescens): Look for the white-flowered form for the best evening visibility. It is not as showy as the popular dark violet version, but it’s more fragrant and will be more visible in darker lighting.
  • Licorice Plant (Helichrysum petiolare): Small, round, woolly leaves in silvery grey drape well in hanging baskets and can be very showy at night.
  • Jasmine (Jasmine officinale): This white-flowered jasmine is a vigorous twining shrub producing very fragrant flowers, attracting moths and glowing under moonlight.
  • Moonflower (lpomoea alba): Easy to grow, this annual has large, white, pink or purple fragrant blooms that open in early evening and last all night. Heart-shaped leaves make this a great vine to cover a trellis or fence. This fast-grower loves full sun.
  • Stock (Matthiola incana): Many kinds bear fragrant flowers that can add a delicious sensory experience to an evening garden.
  • Tobacco Flower (Nicotiana sylvestris): Long, tubular white flowers are intensely fragrant and dramatically visible even in near-darkness.

Perennials

  • Hosta (Hosta ‘Sum and Substance’): The bright, glossy chartreuse/gold large leaves (10″ across) of this hosta form a mound of brightness in the moonlight.
  • Lamium (Lamium maculatum selections): An excellent ground cover for shade, this plant has leaves of silvery white and green with white, pink or purple blooms.
  • Lavender (Lavandula): Fragrant English lavender (L. angustifolia), French lavender (L. dentata), ‘Provence’ and similar types (L. x intermedia) are the best bets for evening beauty.
  • Evening Primrose (Oenothera fruticosa): Night-flying insects are attracted to the delicate fragrance of this pretty flower. Remaining closed during the day, its petals uncurl at dusk. These drought-tolerant plants are ideal in full sun.
  • Pinks (Dianthus): Many hybrids have lost their delightful clove scent, but others are reliably fragrant. These include cheddar pinks (D. gratianopolitanus); cottage pinks (D. plumarius) and maiden pinks (D. deltoides).
  • Verbena (Verbena bonariensis): Tall, erect stems with clusters of small, purple flowers attract moths at night as well as bees and butterflies during the day. Grow in a sunny spot in moist, well-drained soil.

Bulbs

  • Lilies: Madonna lily (L. candidum), ‘Stargazer’, ‘Casablanca’ and other Oriental hybrids are extremely fragrant and beautiful, even in darker conditions.
  • Tuberose (Polianthes tuberosa): This bulb, treated as an annual, produces exotic, sweet-smelling white flowers.

 Shrubs/Vines

  • Butterfly Bush (Buddleja davidii ‘White Profusion’): This luminous plant has fragrant flowers that make it irresistible to moths. Also try the deep purple ‘Black Knight’ for a dramatic contrast. Plant in a sunny, well-drained location.
  • Daphne (Daphne burkwoodii): ‘Carol Mackie’ has variegated foliage with star-shaped, richly fragrant, pale pink flowers that can glow in moonlight.
  • Japanese Honeysuckle (Lonicera japonica): Either evergreen or deciduous varieties can be a suitable choice for evening interest.
  • Mock Orange (Philadelphus): Most kinds are fragrant, especially sweet mock orange (P. coronarius).
  • Roses (Rosa): Many old roses are fragrant, including the damasks, Bourbons, hybrid perpetuals, Chinas and rugosas, as are many David Austin shrub roses. Choose varieties with white or pale blooms for more evening or nighttime glamour.
  • Summersweet (Clethra alnifolia): This handsome, well-foliaged shrub has a summertime display of fragrant, pinkish-white flower spikes lasting for up to six weeks. It is well-suited for use near water and a good bee plant.
  • Viburnum (Viburnum species): Three selections are especially fragrant and ideal for evening flair: ‘Burkwood Viburnum’ – An upright 8-10’, multi-stemmed shrub that produces a white flower. ‘Korenspice Viburnum’ – With a mature height of 5′ to 8′, the Korenspice has pink to reddish buds that open to fragrant, white flowers. ‘Mohawk Viburnum’ – A cross between Burkwood and Korenspice, the Mohawk displays dark red buds which open to white with red blotched reverse flowers. The flowers have a strong clove fragrance to them.

Herbs

  • Lemon Verbena (Aloysia triphylla): With an oh-so-lemony delightful fragrance, lemon verbena has fragrant, narrow leaves and small white flowers. Leaves are strongest in scent and flavor while the shrub is in bloom, but can be harvested at any time. Plant in a moist sunny location. Unlike many herbs, lemon verbena retains its scent for years when dried.
  • Rosemary (Rosmarinus officinalis). Rosemary’s fragrant flavor is spicy, warm and pungent, reminiscent of pine, balsam and ocean air. There are so many uses for rosemary that no garden should be without this herb. Along a path, rosemary releases its fresh, clean scent when brushed against at any time of day or night. Rosemary can take the heat, and does well against a brick or stone wall or in a pot on a sunny patio or terrace.
  • Scented Geraniums (Pelargonium): Of the many varieties, those with scents of rose, lemon and peppermint are the most fragrant.
  • Pineapple Sage (Salvia elegans): This 3’ evergreen shrub has bright scarlet flowers in late summer and fall.

Adding plants specifically for evening enjoyment can enhance your garden for many hours, and with so many nighttime beauties to choose from, no garden should be without some after-dark drama.

eveningplant2eveningplant3

eveningplant4

eveningplant1

Summer Watering Tips

As the days heat up, watering can become a dreaded garden chore and too many gardeners use wasteful techniques that use plenty of water but don’t give their plants the moisture they really need. Make watering plants easier and more efficient with the proper practices and tools…

  • Mulches not only make plantings look more attractive, but their most important functions are to help retain soil moisture and minimize weeds, which would also usurp moisture from your plants. Mulch around plants to a depth of 2-4 inches, refreshing mulch as needed to maintain that depth and attractiveness.
  • Watering cans and small containers work great for spot watering plants with different watering needs by hand. You don’t always need to get out a hose or sprinkler to get the watering done.
  • Check to make sure that you have the proper length hose(s) to reach every corner of your garden. Take into account any obstacles in the way, and be sure you aren’t dragging the hose over any delicate plantings to reach more distant dry spots.
  • Add a water wand to the hose to get the water where it’s most needed – the base of the plants – without needing to bend over repeatedly, which can cause back strain.
  • The best time to water is during the early morning hours of a sunny day. This will allow plants to absorb more water before it evaporates when temperatures rise, but won’t leave water to sit on plants overnight when mold can develop.
  • Always water plants and container gardens thoroughly and deeply to encourage deeper, more drought-tolerant root systems. It is better to water less frequently but more deeply rather than more often but with less water.
  • In the landscape, a good rule of thumb is to provide an inch of water per week minimum. Keep track of precipitation with a rain gauge to avoid wasting water by overwatering when Mother Nature does the job.
  • New individual plants that are set out, direct sown seed beds, sodding, etc. often require daily care, including watering, until established. Check moisture levels carefully during this period so the plants are well cared for.
  • Use soaker hoses to provide slow drip watering. This allows plants to absorb water easily without wasting water by evaporating from foliage or spraying into the air. Soaker hoses can even be layered beneath mulch to preserve as much moisture as possible.
  • Pay extra attention to plants in containers and hanging baskets as they tend to dry out faster and with greater frequency. These plantings will likely need to be watered daily or even multiple times a day during heat waves.
  • Place Tree Gators, a drip irrigation bag, on newly planted trees for slow, steady watering that will soak down to the root system without draining away along the surface of the soil.

If you’ll be away on an extended vacation, or even just for a few days, make arrangements with a trusted friend or neighbor to “plant sit” while you are gone. There’s nothing worse than worrying about your garden while you’re away – except coming home to crisp plants that haven’t been watered properly!

wisewatering1

wisewatering1

Less Pain, More Gain: Ergonomics in the Garden

Merriam-Webster defines ergonomics as: An applied science concerned with designing and arranging things people use so that the people and things interact most efficiently and safely. Experts in ergonomics strive to design and produce items that better match the capabilities, limitations and needs of the people who use them. The result is a safer product that causes less fatigue and stress on the body, while still allowing you to perform the same functions as with regular tools or items.

How Gardening Can Hurt Your Body

Repetitive gardening activities can put you at risk for carpal tunnel syndrome and tendonitis, and can exacerbate other conditions such as arthritis, sciatica and other aches and pains. Poor movement or sudden strains can pull muscles or pinch nerves, which can lead to days or weeks of recovery, doctor appointments, tests, medications and other treatments. Even worse movements could lead to more severe injuries, falls or sprains which could cause you to miss out on a gardening season altogether. Listen to your body – if a movement hurts, change what you are doing and the tools you are using.

Ergonomic Garden Tools

Before purchasing the tools required to perform your garden chores it is best to choose those that fit the job – weeding, pruning, digging, trimming, harvesting, raking, etc. It is equally important, however, that the tools fit you as well – your size, your grip, your posture and your preferences.

Ergonomic tools will help you accomplish different garden tasks with greater efficiency and reduced effort, force, bending, leaning or twisting. With the correct tools you will be able to dig, trim and cut more, in less time, with less effort and more gardening enjoyment. Some ergonomic tools may look no different than the familiar tools you’ve been using for years, but they may be made of different materials to be lighter or stronger. There may be angle or length changes in handles to allow for easier use, or handles may be cushioned to provide firmer grips without causing pain or fatigue. Some tools, such as portable stools or combined tools that include buckets as well as a seat or kneeling pad, help make gardening chores more accessible and comfortable as well.

Ask one of our employees for their assistance in making your garden equipment choices. We carry a wide selection of ergonomic garden tools and are happy to help you choose the right device, size and style for you to accomplish your gardening chores safely and pain free.

ergo-1

ergo-2

Eliminate Water Garden Algae

During the summer months you can eliminate algae easily, effectively, naturally and attractively with the simple addition of appropriate pond plants to your water garden. Three factors contribute to excess algae growth: sunlight, nutrients and low oxygen. While it may be impossible to eliminate every speck of algae – it is still part of your aquatic ecosystem, after all – when you work to control those factors, you also control and minimize algae without adversely affecting your water garden.

Limit Sunlight

Algae needs abundant sunlight to reproduce, and sunlight also raises the water temperature which helps algae grow even more quickly. In shady, cooler ponds and water gardens, however, much less algae is able to grow. You can easily reduce the amount of sunlight reaching the water surface in your garden by 40-60 percent by adding floaters that will cover the surface and provide shade. Top water garden floaters include water hyacinths and water lettuce, both of which successfully reduce excessive algae growth. For the best results, cover 50 percent or more of the water’s surface area with floating plants.

Reduce Nutrients

Because algae can grow so rapidly, it requires abundant nutrients to reproduce. If you remove those nutrients, there will be less nourishment available to sustain algae growth. Submerged plants, such as water lilies and lotus, compete with algae for limited available nutrients, essentially starving the algae to death, while at the same time adding their own beauty to your backyard pond or water garden. If fish are part of your container garden or pond, be sure you are not overfeeding them, since excess, uneaten food quickly decays into vital nutrients algae can use as well. Similarly, prune and clean out any decaying plant foliage so it does not become the nutrients algae needs.

Increase Oxygen

Algae thrives in stagnant water, and abundant oxygen is toxic to these simple growths. Oxygenating plants like milfoil and hornwort should be included in your plant choices to increase the oxygen in your water garden and make it less suitable for algae. More oxygen will also be healthier for any fish, frogs or toads that might call your water garden home, and many other water garden plants will also thrive with better oxygen in the water.

Stop in and see our extensive collection of water garden plants and supplies. Our well-informed staff will assist you in making the best choices for your water garden to help reduce algae growth and keep your water garden or pond clear and sparkling.

algae-1

algae-2

Lyme Disease

For those of us who work and play outdoors in deer tick-infested areas, Lyme disease is a reality. If caught early, the disease is usually cured with antibiotics. If not detected and treated early, Lyme disease can be a debilitating condition that may linger for months or years.

Lyme disease is transmitted through the bite of a deer tick. The tick becomes infected with the disease by biting an animal that is carrying the bacteria. The main culprits in our area are the white-tailed deer and white-footed mouse. Not every deer tick is a carrier of Lyme disease but it is wise to always take precautions to prevent potential infections.

Protect yourself and your family by:

  • Wearing light-colored clothes to help spot and identify deer ticks before they attach to spread the infection.
  • Wearing long sleeves and pants to minimize exposed skin that can attract deer ticks. Tuck your pants into your boots or socks. Include a hat for added protection.
  • Spraying exposed skin with a product that contains at least 20 percent DEET and spraying clothing, and all other cloth gear, with a product containing Permethrin. Always follow the product label when applying repellents.
  • Removing clothing and immediately laundering it when coming back indoors. Dry clothing at a high temperature for at least 30 minutes, since ticks are sensitive to dryness and will die quickly without appropriate moisture.
  • Showering immediately and thoroughly after being in a tick-prone area. Inspect all skin surfaces, especially hard-to-see areas like behind the knees, the back of the neck and in arm pits. Ticks that carry Lyme disease are very small and therefore hard to see. Ticks must be attached for at least 18 hours in order to transmit Lyme disease.
  • Protecting pets from ticks with appropriate collars, drops, powders or dips, and inspecting pets’ fur regularly for ticks or other pests.

Protect your yard by:

  • Mowing the grass regularly. Ticks thrive in longer grasses with moist soils, but are not as abundant in groomed areas.
  • Keeping leaves raked and keeping the yard free of refuse that can create moist patches in the soil where ticks will thrive.
  • Creating a protective barrier, at least 3-4 feet wide of mulch or stone, between yard and wooded area. Ticks are not easily able to cross these open areas.
  • Stacking wood neatly in a dry area where it is less likely to harbor a tick infestation.
  • Spraying your yard with a tick control product like bifenthin. Always follow the product label when applying pesticides.
  • Taking steps to discourage deer and mice in your yard, such as choosing deer-resistant plants and using traps responsibly to eliminate rodents.

By taking appropriate precautions to protect you, your family and your yard, you can minimize any risk of contracting Lyme disease.

mow

Perennials for the Cutting Garden

The classic gardener’s dilemma is whether to cut flowers for enjoyment or leave them to look nice in the garden. Often, removing flowers from the border can make it less attractive and leave an unsightly hole in the overall garden design. The cutting garden solves this problem and allows you to grow many plants that have beautiful cut flowers but are less than lovely in the garden. For example, many varieties of carnations have a tendency to flop with their heavy flower heads. The cutting garden offers an excellent place to hold perennials in reserve until you are ready to plant them in the garden, and it is a great place to practice with new perennials.

Planting Perennials for Cutting

Traditionally, the cutting garden has been basically utilitarian with perennials grown in rows like a vegetable garden. But, by growing enough plants (a minimum of three) of each perennial in your garden, you will have plenty of flowers to make the garden more attractive. Plant the tallest flowers so they don’t shade the shorter ones, and consider more natural curves and groupings in your garden so any missing plants aren’t so obvious.

Perennials for Cut Flowers

Many beautiful perennials are ideal for a cutting garden. While you should choose blooms that will thrive in your climate, soil type and yard conditions, these are popular choices that do well in many different areas…

Achillea                                    Aconitum                                 Allium

Anemone                                 Anthemis                                 Aquilegia

Armeria                                    Asclepias                                  Aster

Astilbe                                      Boltonia                                   Campanula

Catanache                                Centranthus                             Chrysanthemum

Convallaria                               Coreopsis                                 Crocosmia

Delphinium                              Dianthus                                  Dicentra

Doronicum                               Echinacea                                 Echinops

Eupatorium                             Filipendula                               Ferns

Gaillardia                                 Geum                                       Grasses

Gypsophila                               Helenium                                 Helianthus

Heliopsis                                  Hemerocallis                            Heuchera

Hosta                                       Iris                                            Kniphofia

Lavendula                                Liatris                                       Lillium

Lobelia                                     Lupinus                                    Lysimachia

Lythrum                                   Paeonia                                    Papaver

Penstemon                              Perovskia                                 Phlox paniculata

Physostegia                              Platycodon                               Rudbeckia

Salvia                                        Scabiosa                                   Solidago

Stokesia                                   Thalictrum                               Trollius

Veronica

Study different cultivars of each type you are interested in, and don’t forget to include greenery as well as blooms to enliven and fill out your cut bouquets.

Tips to Increase the Lifespan of Cut Perennials

While flowers may last longer in the garden, that doesn’t mean they will immediately wilt once they are cut. To make your cut perennials stay plump and fresh for longer…

  1. Cut flowers in the morning or evening when they are most turgid.
  2. Use a sharp knife or pair of scissors to make a clean cut. Plunge stems into water immediately.
  3. When arranging the flowers, remove any foliage from the base of the stems (no leaves should be underwater). Re-cut stems before putting the flowers in a vase.
  4. Place your arrangements in a cool room out of direct sunlight and change the water daily.
  5. Add Floralife, a preservative, to prolong flowers.

A cutting garden can be a beautiful and practical addition to your yard, and while it may need different care than your other landscaping, it can be just as vibrant.

Cutting_3Cutting_4

Cutting_1

Cutting_2

Beyond Lettuce

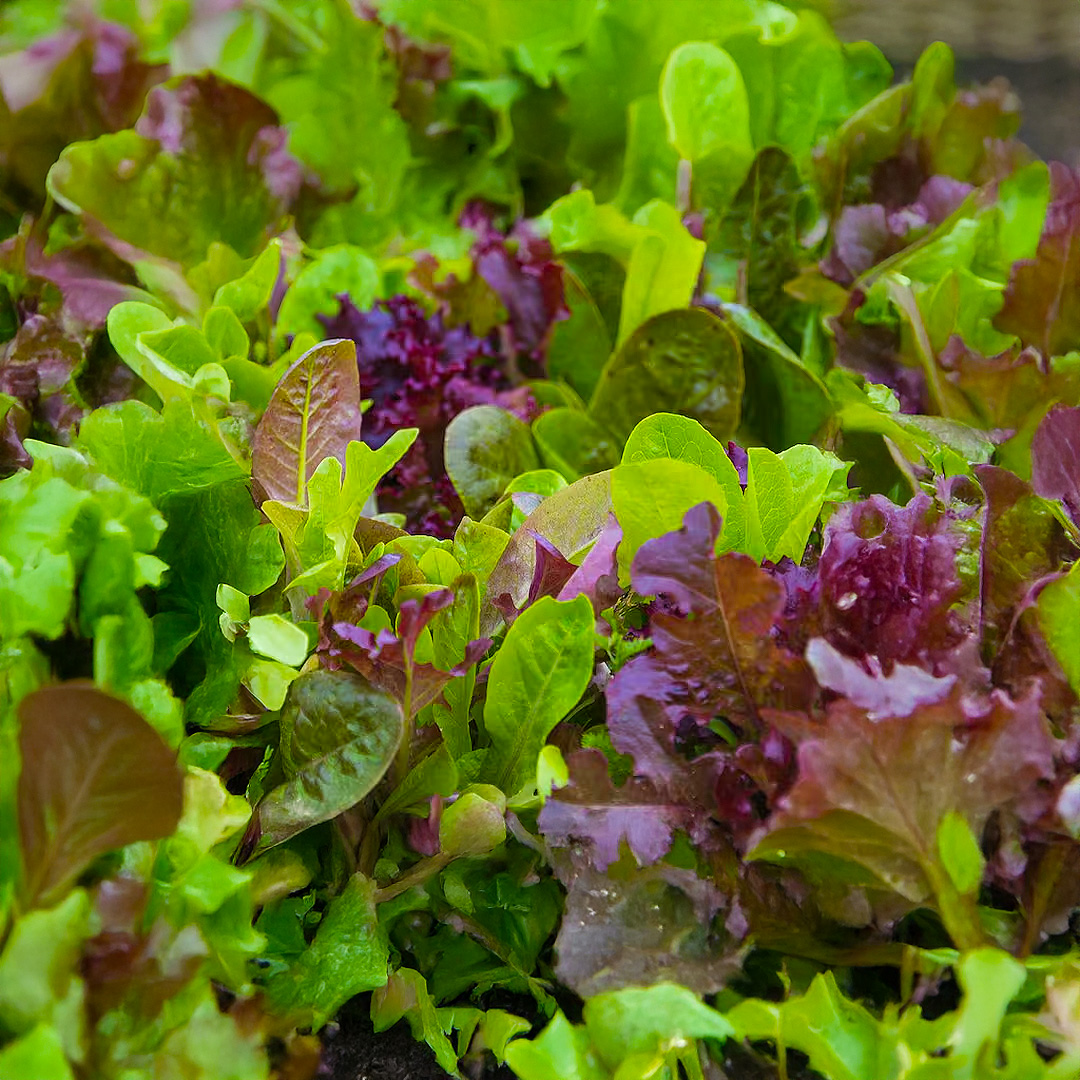
There’s nothing like a garden fresh, crisp salad, and these days, many people are adding varied greens to their salads besides familiar lettuce varieties and common spinach. Try growing a few of these less familiar greens for your own salads or for sale at your farmer’s market. Greens can grow in cooler or warmer weather for year-round freshness and healthy eating.

Cool Weather Greens

  • Mache (Valerianella locusta) – Also known as corn salad or lamb’s lettuce, mache is a popular French green. It is very cold tolerant if grown under covers, and will seed itself once temperatures rise above 80 degrees. Maturing in about 50-60 days, the small, dark green leaves are sweet and juicy. Mache attracts snails and slugs, so you may want to grow it in raised beds or put out bait to distract critters.
  • Claytonia (Claytonia perfoliata) – Very high in vitamin C, claytonia, also known as miner’s lettuce, was eaten by miners in the California gold rush to keep from getting scurvy. Claytonia is also very cold tolerant, and will grow under covers even in winter. It takes about 40 days to be ready to harvest, and can be eaten even after in flower, though it is better when the flower stalks are still short.
  • Mibuna and Mizuna – These two closely related Asian greens grow quickly and tall in cooler, moist weather. Mibuna has a mustard-like flavor, while Mizuna is more peppery. Both are good raw in salads or as part of a stir-fry dish. Both are good for “cut-and-come-again” harvesting, though on smaller plants the stress may cause them to go to seed prematurely.

Warm Weather Greens

  • Orach – This colorful, vitamin rich plant is often considered a warm season alternative to spinach. It can grow in either cool or warm weather, as it does not get as bitter as spinach after flowering. This hardy plant can tolerate mild frost, as well as salty areas, and can grow anywhere from 4-6 feet tall.
  • Purslane – Though commonly considered a weed, this green is very nutritious, with high amounts of Omega-3 fatty acids, vitamin E and beta carotene. Its tangy flavor and crisp texture make it a great addition to salads, and its oily content benefits homemade pesto or other sauces and dips. Purslane spreads out to about 18 inches, and will not tolerate frosts.
  • Malabar Spinach – This vining green loves the heat. Long past when other greens have wilted or gone to seed, malabar is still crisp and tasty. The leaves also hold up better in soup and stir fry than most greens. The raw leaves taste like peppery citrus, but when cooked it is much closer to the taste of spinach.

Trying new greens can be an interesting experiment in the garden or greenhouse, and they can add rich variety, texture and tastes to your salads and other recipes. Try some of these less familiar greens and you’ll fall in love with salads all over again.

Beyond Lettuce

Beyond Lettuce

Great Gifts for Dad

Is your dad a hands-in-the-dirt, let’s-get-sweaty, these-weeds-will-never-win gardener? Whether he gardens with a fierce passion, calculates his harvest, or just enjoys this hands-on hobby, there are many great gifts for Dad to help him enjoy every moment he spends tilling, planting, weeding, watering, and harvesting.

Garden Center Gifts for Dad

Garden centers have a full crop of gifts for the gardening Dad. He’s always done his best to be a good provider, so why not give him a gift to make his gardening time even more productive? These top options are always popular gifts.

  • Tools – Give Dad a helping hand in the garden with new hand tools or other small tools. If he’s a lefty, left-handed tools will have a more comfortable grip, or choose ergonomic designs. New tool designs may make gardening tools more efficient, or look for upgraded options for Dad’s favorite tools.
  • Tools for Tools – If Dad prefers his old tools, help keep them in good condition with a new whetstone or sharpener, appropriate oiling, or new grips. A tool organizer belt or stand can be a great gift, or find accessories to help out in the garden, such as a hose extender.
  • Plants – Help Dad expand his garden with a gift of plants, from established seedlings to dormant bulbs to seeds for all his favorites. For a more unique gift, consider finding heirloom vegetable varieties or planning a grilling herb garden that Dad will love.
  • Space – Give Dad more room to grow when you expand his garden space with an elevated planter or green wall, hanging planters, or an arbor, trellis, or other support structure that can give climbing vegetables more room to thrive.
  • Attire – Make sure Dad is well-equipped for his gardening efforts with the right clothing. A broad-brimmed hat, durable gloves, and waterproof boots can help him tend to gardening chores in any weather.
  • Feeders – A garden feeds more than just a family, and if Dad doesn’t mind a few wildlife guests sneaking a free meal, help him attract birds and butterflies with the right feeders or houses to welcome those guests.
  • Excluders – Not all garden guests are equally welcome, and some men will prefer gifts that keep unwanted visitors away from the harvest. Baffles, deer-resistant plants, or humane traps can be good options for only letting welcome guests into Dad’s garden.
  • Monitors – Let Dad get all the data he wants to make his garden great when you give him an outdoor thermometer, barometer, or complete weather station setup. Rain gauges, hose timers, and soil test kits are other useful choices.
  • Signage – Tell the world how great Dad’s garden is with a sign that proclaims “Dad’s Garden” or is personalized with his name. Other personalization, such as jobs or favorite sports teams, can be fun options to add Dad’s flair to his garden.
  • Nourishment – It may not be the cleanest gift but it can be a clever one if you give Dad a load of compost, manure, or other fertilizer to help his garden grow. Even better is if your gift includes plenty of help to spread that nourishment around and work it into the soil.

The Best Gift for Dad

The very best garden-themed gift of all is showing Dad how much you appreciate both him and his garden. Spend time with him in the garden attending to necessary tasks or harvesting the latest tasty vegetables. Compliment how productive his plants are or how bountiful the harvest has been, and ask for tips and guidance to bring his expertise to your own planting and gardening efforts. The more you spend time with Dad in the garden, the more wonderful memories you will be able to grow together that you can harvest and enjoy for years to come.

Gifts for Dad

Gifts for Dad

Gifts for Dad

Great Gifts for Mom

Spring is the perfect gardening season and as Mother’s Day approaches right at the height of spring, why not celebrate Mom with a gardening gift? The garden center is packed with great gifts for Mom that are ideal for Mother’s Day, birthdays, or any occasion to tell Mom just how much she means and how appreciated she is.

Garden Center Gifts for Mom

Many gift ideas can come from the garden center. When choosing the best gift for Mom, consider her preferences, needs, and favorites to find a gift that suits her gardening style. The most popular gift ideas include…

  • Tools – Help Mom make the most of her gardening with all the best tools to get the job done. Smaller hand tools that will be more comfortable in her hand are a great choice or choose ergonomic tools for a more comfortable grip. Is Mom a lefty? Choose left-handed tools that will be more efficient for her to use.
  • Attire – Let Mom show off her gardening style with practical attire to wear while she gardens. A broad-brimmed hat with a quirky ribbon, a colorful pair of garden gloves, a comfortable pair of clogs, or a sweatshirt for chillier gardening days are all good choices. Opt for Mom’s favorite colors or patterns for an even more thoughtful gift.
  • Signs – Mom has always been welcoming, so why not extend that hospitality into the garden with a welcoming sign? Personalized wooden signs can declare the space as “Mom’s Garden” or can be customized with her name or initials. Fun garden flags are another option to add a greeting to the garden’s entrance.
  • Fairies – Help Mom add a whimsical touch to her garden or containers with fairy accents. Small props such as charming houses, sweet little swings, quirky toadstools, and other decorations can be a fun addition to a garden of any size, from simple containers to a more extensive plot. Garden gnomes can also be a fun choice.
  • Plants – Give Mom something new to grow with a gift of seeds, bulbs, or seedlings. Choose her favorites or splurge on a new exotic variety she’s always wanted to try. If spring hasn’t quite sprung, you can also opt for houseplants or indoor garden options such as herbs to let her enjoy her green thumb even in poor weather.
  • Feeders – Let Mom welcome wildlife into her gardening space with a feeder for feathered guests. Hummingbird feeders are especially popular, as well as oriole feeders. Regular birdseed feeders can also be a great choice for the Mom who welcomes all sorts of visitors and may not mind a bit of spilled seed in her garden.
  • Houses – Another way Mom can welcome wildlife into the garden is by providing suitable homes for guests. Birdhouses, bat houses, bee houses, toad shelters, and butterfly houses are all great options that can not only give Mom joy when she sees new residents move in, but they are beneficial to the garden with pest control and pollination.
  • Totes – If Mom needs a bit of help hauling all her tools, seeds, and other gear around the garden, a tote bag, bucket, or basket can be a convenient and helpful gift. For even more industrious hauling, consider a small wagon, wheelbarrow, or garden cart that you can fill with other surprises and gifts.
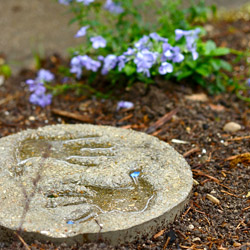
  • Stepping Stones – Add a personalized touch to Mom’s garden with a homemade stepping stone that includes the names of children, grandchildren, or pets. Handprint or pawprint kits are other meaningful choices, and the stones can be decorated with colored pebbles, embedded jewels, and other creative accents.
  • Containers – If Mom has trouble containing her excitement for gardening, new containers can help expand her gardening space. Choose colorful pots, stackable gardening systems, hanging pots, or wall containers for more space. If Mom has a bit of trouble getting down to the dirt, an elevated planter can be a perfect gift.
  • Décor – Add a bit of flair to Mom’s garden with a decorative gift such as a gazing ball, whimsical statue, wind chimes, or wind socks. Decorations can even have a practical side if you choose a barometer, rain gauge, plant identification stakes, bird bath, or other gift ideas that bring both beauty and functionality to the garden.
  • Hand Care – Help Mom keep her skin lovely after a day of rough gardening with hand care gifts. Lotions, soaps, and exfoliants are all available and are often infused with beautiful garden scents such as favorite flowers and herbs. Not only will these gifts keep Mom’s skin healthy, but they will remind her of all the joy she takes in gardening.
  • Jewelry – Let Mom show off her passion for gardening with fun garden-themed jewelry such as a charm, pendant, pin, brooch, or earrings in the shape of watering cans, garden tools, or favorite plants and flowers. Mom might wear the jewelry, or jewelry could be attached to a garden tote or hand tools for a bit of bling.

The Best Gift of All

The very best gardening gift you can give Mom is just to appreciate her and her garden. Compliment the beauty of her flowerbeds or the tastiness of her herbs and vegetables, or admire how she manages to bring a plant back from the brink or coax a bigger harvest from a smaller plant. Better still, offer to help in the garden with less enjoyable chores or just spend time with Mom and all she loves about gardening. That time will become a memory you can both enjoy, and will be a gift not just for Mom, but for you as well.

Gifts for Mom

Gifts for Mom

Gifts for Mom

Creating Shade

Shade is essential to make your outdoor living space more pleasant and comfortable so you will be able to enjoy it more often, even on the hottest days. Whether your yard already has some natural shade or you need to shade an entire sunny oasis, there are many options to choose from.

Map the Light

Before you put up a new structure or plant trees for shade, study where the shade already is in your yard. How does the sunlight change throughout the day or in different seasons? Is there natural shade you can make use of? How intense is the sunlight in different spots? Also, take note if you’d like to keep some sun in your space so you don’t create too much shade.

10 Great Ways to Add Shade to Your Outdoor Living Space

Depending on the size and shape of your space and how much shade you want, there are many ways to keep out some or all of the sunlight.

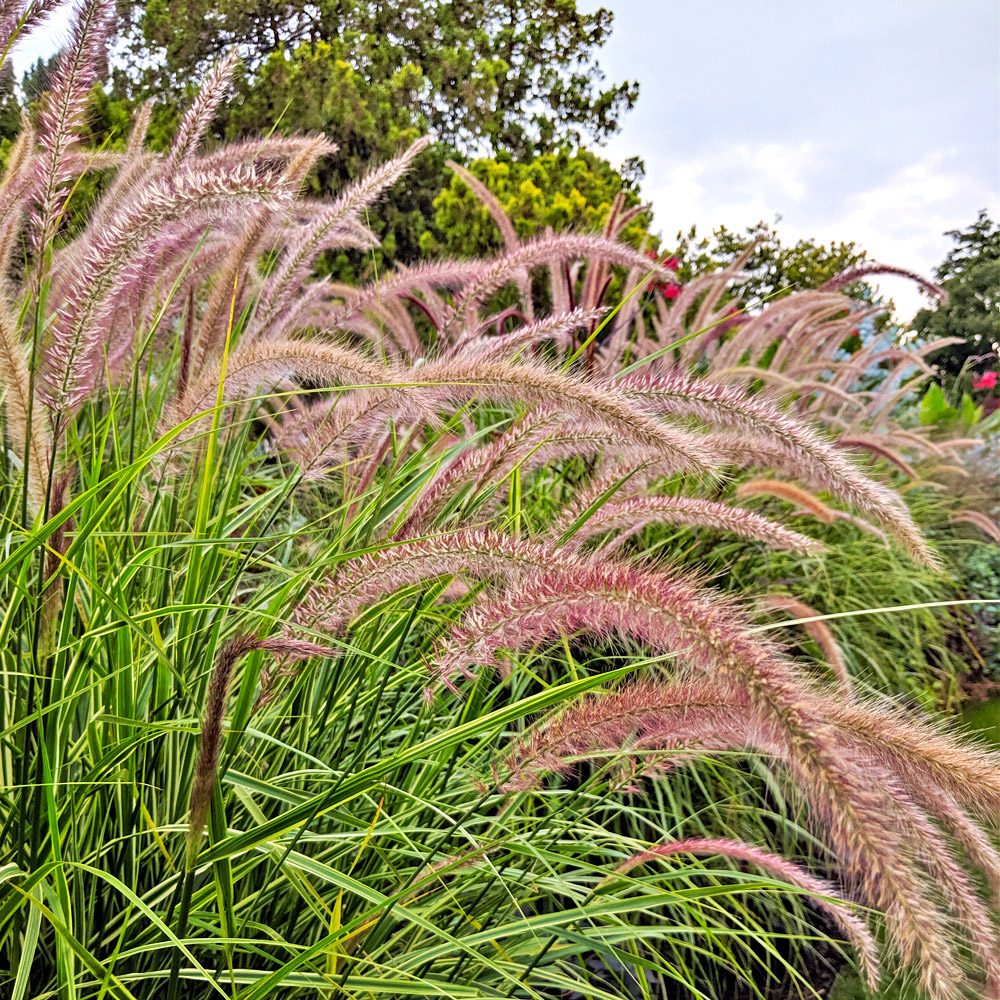
  1. Plants – Natural shade is great for any space, but if you don’t want to wait years for a tree to grow, choose fast-growing shrubs or privacy options such as bamboo or tall fountain grasses. You can also add large hanging pots of flowers and ferns for instant shade.
  2. Structures – All types of yard structures can add shade to your space. A gazebo, pavilion, pergola, trellis, or arbor can provide shade, and you can add climbing vines to the structure to thicken the shade and soften its lines for a more natural feel.
  3. Umbrellas – Adding an umbrella is an instant way to create shade in your space. Umbrellas come in different sizes, and some have articulating hinges to be tilted at different angles for the best shade in different seasons.
  4. Awnings – A classic way to shade a deck or patio, awnings can be permanent fixtures or may fold or retract when not in use, giving more flexibility to your space. Awnings may be canvas, fabric, or even metal.
  5. Curtains – Breezy fabric walls and curtains can shade your space without making it feel enclosed or contained. Choose loose, sheer fabrics or even lace for light shade, or heavier, solid draperies for thicker, cooler shade.
  6. Shade Sails – Tightly stretched, triangular shade sails add shade to your space with a sleek, modern touch. These sails come in different colors and sizes and can be oriented to shade even in awkward spaces.
  7. Vertical Shades – When the angle of the sun drops, vertical shades can be perfect for cutting glare and keeping your space shaded. Rolling blinds or Roman shades are popular, and different panels can be adjusted individually for more versatility.
  8. Canopies – A simple canopy immediately shades space under a pergola or other open roof, or a temporary canopy can be erected on a simple frame. Different colors and weights of canvas and fabrics can be used for canopies, and they can retract on wires to open the space when desired.
  9. Cabanas – A fun way to add shade to a poolside patio or tropical oasis is with a thatched cabana. These peaked roofs still offer some air circulation and can be made thick or thin for different levels of shade.
  10. Mix and Match – There’s no need to settle for one type of shade in your outdoor living space. Choose the different options that meet your needs and match your style, and you’ll be able to enjoy plenty of comfortable shade all year round.

Creating Shade

Creating Shade

Creating Shade

Creating Shade

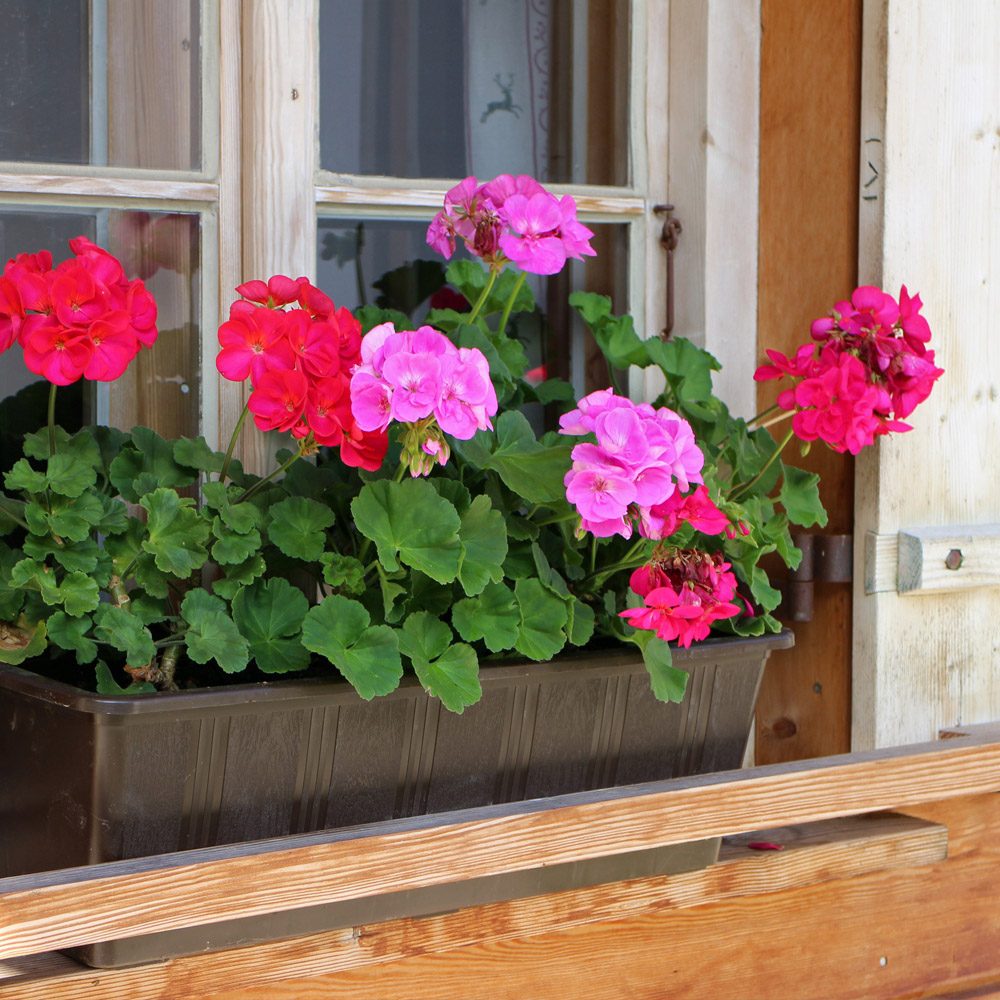
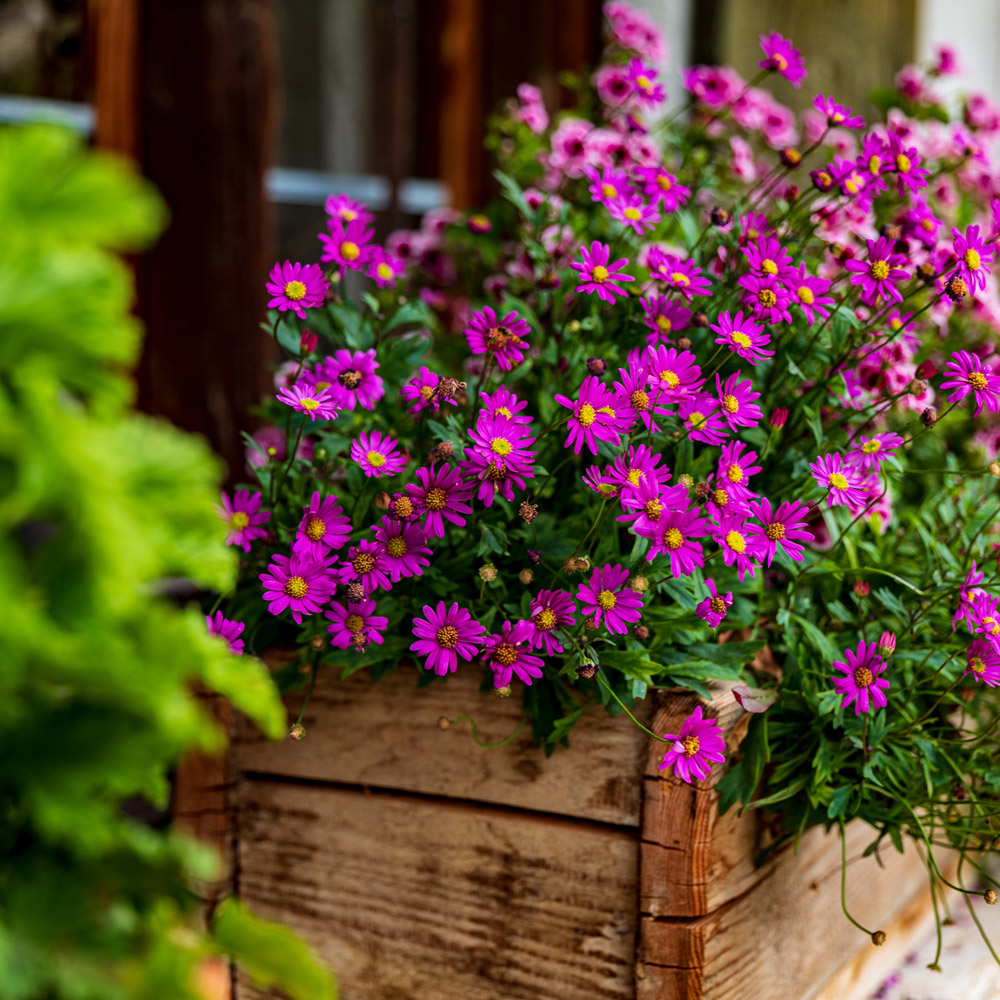
How to Care for Your Window Boxes

Window boxes can provide plentiful gardening space in the city, even without a yard. Whether you live in an apartment, condominium, or row house, you can add window boxes for extra gardening, and with proper care, your window boxes can yield a delicious harvest, fragrant herbs, or stunning flowers for you to enjoy.

About Window Boxes

Window boxes aren’t just for windows, and there are many different shapes and designs to choose from. Over-the-railing boxes are ideal for decks and balconies, and wall-hanging boxes can make use of any vertical space. These versatile containers are available in different sizes, from small, compact containers to much deeper, larger options for even bigger vegetables and multiple plants.

Wood is the traditional material for window boxes and is still a favorite choice for many spaces. Plastic and resin models are also available and can be lighter weight, and metal frames with moss or coir liners are attractive rustic options. You can even get creative with window boxes and choose non-traditional styles, such as repurposing garden boots, apron pockets, tin pails, or other fun containers to make a window box that suits your space and style.

While decorative flowers remain a popular favorite for window boxes, you can grow anything you like in these containers. An herb garden is ideal for these small spaces, or you can choose miniature versions of all your favorite vegetables and fruits. Mix plants up for a diverse window box, and use taller plants, such as climbing vines or grasses, to add more height, while trailing plants such as creepers and dangling vines can spill out of the space for more drama.

Best Window Box Care

No matter what you plant in your window box, you will want to give it the proper care for excellent growth and the most vibrant plants.

  • Mount the box securely.
    Use the proper fasteners to mount your window box, and take into account its full weight as plants grow. Freshly watered, damp soil will be heavier, and the box needs to be secure to hold that weight. If you are placing the box on a railing, be sure the railing is sturdy and the box is not tipped or angled unsafely.
  • Choose appropriate plants for the space.
    Consider the sunlight your box will get when choosing which plants to grow in the space. The sun will shift throughout the season, and you want to be sure your plants have the levels of sunlight they require for their best growth. Also be sure the box provides enough depth for adequate root growth so the plants will be their healthiest, and be aware that window boxes may be subject to extra heat reflecting off glass or walls, so heat-tolerant plants are always a good choice.
  • Use high-quality, moisture-retaining soil.
    Window boxes need good quality potting soil to nurture plants, and which soil you choose will depend on whether you are growing vegetables, flowers, succulents, or herbs. Soil mixes with moisture-retaining granules are a great choice for window boxes and will help keep the plants watered so they stay lush, beautiful, and productive.
  • Water the box properly.
    Window boxes can dry out more quickly than traditional garden spaces and may need to be watered daily or even more than once a day depending on the box size, how the soil retains moisture and the watering needs of your plants. A watering wand can help you reach window boxes in more difficult places, or consider adding water globes to the box for a practical splash of color that will keep your plants watered.
  • Choose slow-release fertilizers for extra nourishment.
    A slow-release, liquid fertilizer is a great option for window boxes and will help provide all the nutrition your plants need. Choose a fertilizer blend that suits your plants’ requirements, and apply it once a week or at whatever rate is recommended for your box size and type of plants.
  • Groom your window boxes regularly.
    Because window boxes are such a small space, it can be easy to keep them looking their best with regular deadheading and other maintenance. Trim and prune plants as needed to help them retain their shape, always using good-quality hand tools with sharp blades for safe, smooth cuts. If you are growing edibles, harvest your produce regularly to encourage even more production.
  • Protect window boxes from sudden cold.
    Just like any plants, window box gardens can be damaged by cold snaps. Invest in appropriate plant covers to shield the boxes if the temperatures drop, and even consider bringing them indoors temporarily if a freeze is threatening. Adding a layer of insulation to the inside of a generous box, such as lining it with foam board, can also help protect delicate roots from possible cold and retain moisture throughout the season.

Add More Enjoyment to Your Window Boxes

Don’t be afraid to think outside the box with your window boxes. Any urban garden – even a small one at your windows or on your railings – can have quaint touches, such as adding a small bird feeder, a fairy garden, or a decorative garden stake or flag. These accents can help you personalize your box and truly make your small garden a relaxing and enjoyable space, no matter what its size or where you plant it.

How to Care for Your Windowboxes

How to Care for Your Windowboxes

How to Care for Your Windowboxes

How to Care for Your Windowboxes

Wonderful Watermelon

Juicy, cool, and sweet watermelon is the perfect summertime treat, and no summer shindig is complete without this refreshing addition. Did you know that watermelon is also easy to grow? Impress your friends at your next summer soiree with the freshest fruit straight from the garden.

Let’s Begin

Watermelon may be grown from seed directly sown or from transplants. No need to rush; it’s best to make sure that both your air and your soil is warm before planting. Large fruiting watermelon plants take about 80 to 90 days to reach maturity: small fruiting varieties about 70 to 75 days.

Planting

Watermelons require deep, rich, nutritious soil to grow and taste their best. Plant your watermelon seeds, or transplants, in a sunny location about 6 feet apart and provide plenty of room for the vines to sprawl. Dig a large hole in your garden bed, about 1 foot deep and wide, and amend it with plenty of high-quality compost. If planting in a raised bed, which is an excellent way to grow watermelon, the bed may be filled with a raised bed mix or topsoil amended with plenty of compost.

Feeding

Fertilize your watermelon plants when they emerge from the soil or at transplant time, again when vines begin to sprawl, and one last time at fruit set with an organic fertilizer recommended for fruits and vegetables.

Watering

Watermelons require ample and consistent water to grow their sweetest and juiciest. Stopping supplemental watering about two weeks before the fruit is ready to harvest will allow for sugar concentration, creating a sweeter fruit.

Tips

  • Mulch the area where the vines will run with a thick layer of mulch. Salt marsh hay or straw are perfect choices. Mulching will keep the developing fruit off the ground, helping it remain clean and preventing it from rotting on moist soil.
  • Watermelons are ready to harvest when the tendrils near the fruit turn brown, the under area of the fruit turns from white to a pale yellow, the green complexion becomes dull, and there is a hollow sound when you knock on the fruit with your knuckles.

The summer growing season is just beginning, and there’s still time to plant plenty of watermelons to impress your guests!

Watermelon

Watermelon

Watermelon